
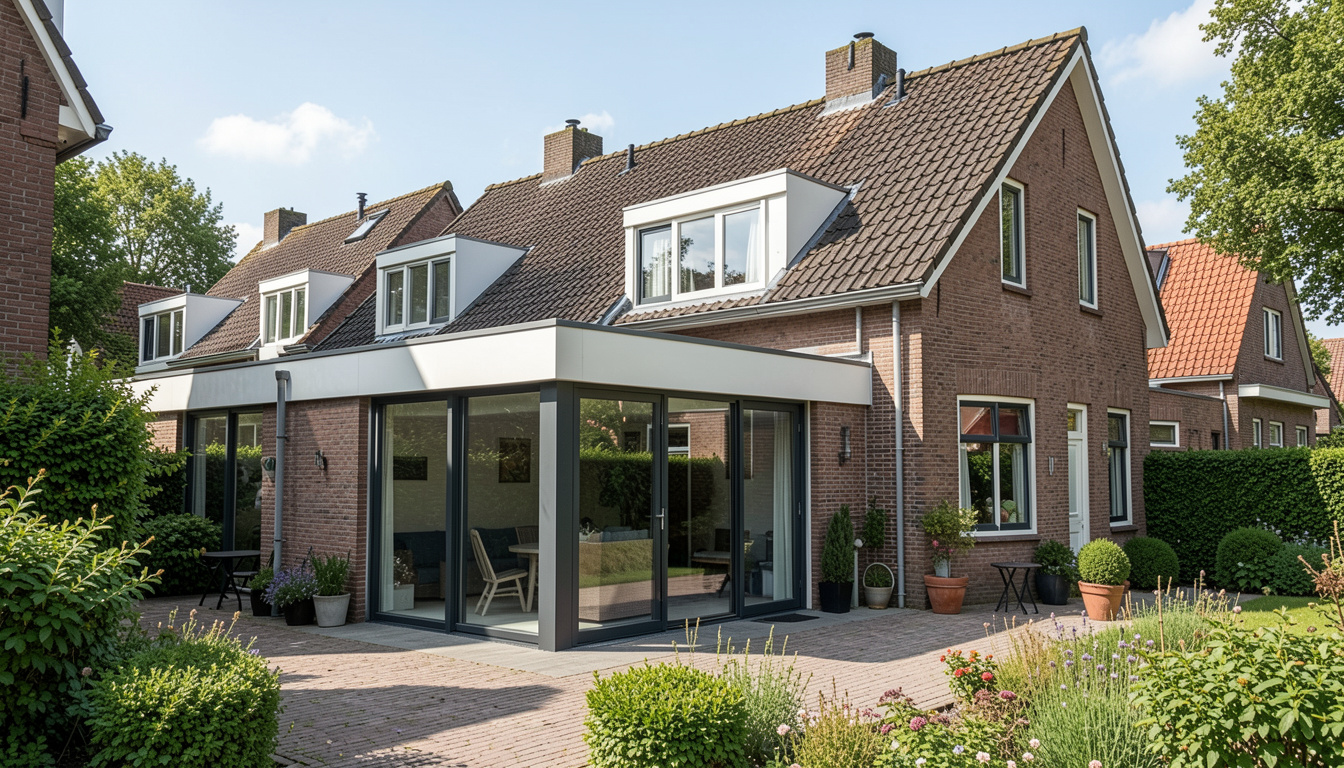
How to build an house extension from scratch in the Netherlands?
When your life outgrows your four walls, the answer isn’t always to move; often, it’s to expand. In the Netherlands, house extensions are a popular way to reimagine living spaces—adding sun-drenched kitchens, quiet home offices, or extra bedrooms while increasing your property’s value. However, the path from an empty garden patch to a weather-tight room is a technical journey governed by strict Dutch building codes and unique soil conditions.
In this guide, we break down exactly how an extension is built from scratch. Whether you are considering a traditional on-site build or a high-tech prefab delivery, understanding the construction phases will help you move forward with confidence.

What are the types of extensions in Dutch homes?
In the Dutch housing market, there isn’t a "one-size-fits-all" solution. Depending on your house type—whether it's a 1930s terraced house (tussenwoning) or a modern detached villa— you have four main ways to add space.
1. The Ground-Floor Extension
(Uitbouw or Aanbouw)
This is the most popular choice in the Netherlands. You extend the footprint of your home into the garden, usually to create a larger kitchen or living area. An Uitbouw is an enlargement of an existing room (like pushing out your back wall), while an Aanbouw is a separate room attached to the house (like a utility room or garage).
Permit Note: If built at the rear of the house within certain depth limits (usually 4 meters), these can sometimes be permit-free (vergunningvrij).
2. The Rooftop Extension
(Dakopbouw)
When you can't build "out" because you want to keep your garden, you build "up." This involves adding an entirely new floor on top of a flat roof or replacing a slanted roof with a new, higher level.
Permit Note: These almost always require a permit and a Bouwhistorie report if you live in a protected cityscape.
3. The Dormer
(Dakkapel)
A dormer is a smaller-scale "upward" extension. It doesn't add a new floor, but it transforms a dark, cramped attic into a bright, usable room by "pushing out" a section of the sloped roof.
Permit Note: Back-facing dormers are often permit-free; front-facing ones are strictly regulated by Welstand (Aesthetics) to ensure they don't ruin the "street view."
4.The Side Extension
(Zij-aanbouw)
If you have a corner house or a detached home with space on the side, a side extension is a great way to add a home office, a playroom, or even a ground-floor bedroom.
Permit Note: These are highly visible from the street, meaning the municipality will be very strict about the materials matching your existing facade.
Which construction method to use?
In the Netherlands, there are two primary paths to building your extension. While the end result might look identical from the outside, the journey to get there is very different.
Path A: The Traditional On-Site Method
[Custom craftsmanship built from the ground up]
This is the classic approach where your extension is built brick-by-brick directly on your property. It is the gold standard for projects that require a perfect architectural match to an existing home, such as 1930s residences or historic monuments.
Path B: The Prefabricated Method
[Millimeter-precision delivered in a single day]
In a country where weather can be unpredictable and city streets are narrow, prefab is a high-tech favorite. Your extension is manufactured entirely in a climate-controlled factory while your garden remains untouched.
The Experience: The "mess" stays at the factory. On the big day, a crane lifts the completed module over your roof, and by sunset, your house is usually sealed and weather-tight.

Which one is right for your project?
A step-by-step guide to the construction process

1. Construction of a Ground-Floor Extension
(Uitbouw / Aanbouw / Zij-aanbouw)
Path A: The Traditional On-Site Method
This is the classic approach, favored for its flexibility and its ability to match the specific brickwork of older Dutch homes.
Step 1: Groundwork & Piling (Heien)
Because much of the Netherlands sits on soft soil, the foundation is everything.
The Soil Check: A sondering determines if piles are needed.
Piling: If the soil is weak, concrete or steel piles are driven into the ground until they reach the solid sand layer.
Excavation: The topsoil is removed, and trenches are dug for the foundation beams and sewage pipes.
Step 2: The Foundation & Concrete Slab
Once the piles are in place, the "foot" of the extension is created.
Foundation Beams: Reinforcement steel is placed in the trenches, and concrete is poured to create a solid ring.
Insulation: High-value insulation (EPS) is laid across the entire floor area.
The Slab: A concrete floor is poured over the insulation, often including underfloor heating pipes.
Step 3: Wall Construction & The Steel/Wooden Beam
Rising up: The two on-site methods for your vertical shell
Once the foundation is ready, the walls begin to rise. Depending on your design goals and the structural capacity of your soil, we generally see two methods built directly on-site:
Method A: Traditional Masonry (The "Solid" Approach)
This is the most common method for Dutch ground-floor extensions, valued for its durability and acoustic insulation.
The Inner Wall (Binnenblad): We use heavy limestone blocks (kalkzandsteen). These are incredibly strong and serve as the structural "bones" to support the heavy stalen or houten balk (steel or wooden beam) that opens up your existing back wall.
The Insulation Sandwich: A thick layer of high-performance insulation is fixed to the outside of these blocks.
The Outer Brickwork: To match your home, masons build an exterior brick wall. A small air gap, or cavity (spouw), is left between the insulation and bricks to ensure the Dutch rain never reaches your interior.
Method B: Timber Frame (The "Fast & Sustainable" Approach)
Known as Houtskeletbouw (HSB), this method is built by carpenters directly in your garden. It is becoming increasingly popular for its superior energy efficiency.
The Skeleton: Instead of blocks, a frame of high-strength timber studs is constructed. The stalen or houten balk is integrated into this timber frame using specialized steel connections or structural screws.
Built-in Insulation: Unlike masonry, the insulation is placed inside the wall frame itself. This allows for thinner walls with the same (or better) thermal performance as brick.
The Finish: While the core is wood, the outside can still be finished with traditional bricks, or modern materials like wood cladding or stucco.

Step 4: The Flat Roof Construction
The roof is a "sandwich" designed to be 100% weather-tight.
The Base: Built with wooden joists and structural plywood or heavy concrete slabs.
The Slope (Afschot): We use tapered insulation to create a slight 2% slope so water doesn't pool.
The "Warm Roof": 12–16cm of PIR insulation is placed on top of the structure to prevent condensation.
The Membrane: Sealed with a waterproof EPDM rubber sheet or Bitumen.
Drainage: Aluminum roof trims are added, along with emergency overflows to prevent water weight build-up.
Step 5: Windows, Doors & Making it Airtight
Before starting the interior, the high-performance window frames and sliding doors are installed. In the Netherlands, we pay extra attention to airtightness (luchtdicht bouwen) around these frames to ensure no heat escapes.
Step 6: Internal Fit-out & Finishing
Now that the Dutch weather is locked outside, the interior transformation begins. This stage involves the "invisible" utilities and the final aesthetic touches.
"First Fix" Utilities
Before the walls are closed up, all the internal infrastructure is installed:
Electrics: Routing conduits for sockets, switches, and recessed ceiling lighting.
Plumbing & Heating: Connecting the underfloor heating pipes to the main manifold and installing any new radiators or water points.
Ventilation: Installing mechanical ventilation ducts to ensure the highly-insulated space remains healthy and free of moisture.
The Flooring (Dekvloer)
Once your extension is weather-tight and the underfloor heating pipes are laid, it’s time to pour the "screed." This layer hides the utilities and ensures your new floor is perfectly level with your existing home.
The Process: A semi-dry, earthy mixture of sand and cement is shoveled into the room. A craftsman "smears" it manually with a straightedge to the correct height.
Best for: Smaller extensions or projects where we need to create a specific slope (like a walk-in shower).
The Benefit: It is traditional, reliable, and allows the builder to manually bridge any small height differences between your old house and the new extension.
The floor is usually walkable after 24 to 48 hours, but it is not yet "dry" enough for its final covering.
Wall & Ceiling Finishing
Insulation & Studwork: If using timber frame or internal partitions, acoustic insulation is added between the studs.
Plasterboards : In the Netherlands, a high-quality plaster finish is the gold standard. Plasterboards are installed carefully on the walls and ceiling to create a "seamless" look.
The Final "Second Fix"
This is where the extension finally feels like part of your home:
Joinery: Installing baseboards (plinten), internal doors, and window sills.
Final Surface: Laying the final floor and painting the walls.
Connection to the Old House: The temporary dust screens are removed, and the transition between the old floor and the new floor is finished with a threshold or a seamless joint.
Step 7: Delivery & Quality Check
The process ends with the oplevering. This is a formal walkthrough with the contractor to identify any "snags"—small details like a paint scuff or a stiff door handle—that need to be corrected. Once these are fixed, the extension is officially yours to enjoy.

Path B: The Prefabricated Method
If you want to avoid months of construction noise, the prefab method moves the "mess" to a factory.
Step 1: Off-Site Manufacturing
While your garden is still untouched, the entire extension—walls, roof, and even windows—is built in a climate-controlled factory. This ensures millimeter-precision and perfect drying conditions.
Prefab Wall Construction
In the prefabricated method, the ground-level walls are manufactured in a climate-controlled factory to ensure perfect drying and structural alignment. Unlike traditional masonry, these walls typically use a Timber Frame (Houtskeletbouw) or a hybrid steel-frame system, which allows for significantly thinner walls without sacrificing thermal insulation. Each wall segment arrives on-site as a complete "sandwich" with the high-performance insulation, vapor barriers, and electrical conduits already built-in. Because the exterior finish—whether it’s traditional brick slips, wood cladding, or stucco—is applied under factory conditions, the extension is not only highly energy-efficient but also ready to be made wind- and water-tight the moment the crane secures it to the foundation.
Step 2: Site Preparation
About two weeks before delivery, a team prepares the foundation and any necessary piling in your garden, just like in the traditional method.
Step 3: The "Big Day" (Installation)
A massive crane lifts the 3D modules over your house and onto the foundation. Your home is usually sealed and weather-tight by the end of the afternoon.
Step 4: The Connection
The final work involves connecting the utilities (electricity/heating) and finishing the seam where the prefab unit meets your original house wall.
Step 5: The Prefab flooring
Why? This prevents tiles from cracking during the vibrations of transport and allows the flooring to run continuously from your old room into the new one without a visible threshold or "gap."
One of the biggest advantages of the Prefabricated Method is that the finishing step is almost entirely completed in the factory. While a traditional build might have plasterers and electricians in your home for weeks, a prefab extension arrives with the conduits, insulation, and wall panels already installed. This leaves only the final "connection" and painting for the on-site team, significantly reducing the disruption to your daily life.

2. Construction of a Rooftop Extension
(Dakopbouw)
For a Rooftop Extension, the construction logic shifts from "digging down" to "weight management." Because you are adding a new floor to an existing structure, the process is highly technical.
Path A: The Traditional On-Site Method (Dakopbouw)
Building the new floor piece-by-piece atop your home
Step 1: Structural Reinforcement
Before building up, we often need to strengthen the existing walls or the top floor joists to support the new weight.
Step 2: Demolition & Opening
The old roof (tiles or bitumen) is removed. This is a high-risk phase where we use temporary "tents" or foils to keep the house dry.
Step 3: Timber Frame Construction (Houtskeletbouw)
Because brick is too heavy for most existing foundations, we build the new walls using lightweight timber frames on-site.

Step 4: The New Roof
The new flat or pitched roof is constructed, insulated, and sealed to make the house weather-tight again.
Step 5: The Staircase Cut
A hole is cut in the existing ceiling to install the new staircase, connecting the old house to the new floor.
Step 6: The Flooring
For a rooftop extension over an existing insulated terrace, the flooring process focuses on achieving a flush level with your home without adding unnecessary weight. In the traditional method, we use a lightweight "dry-build" system: a layer of leveling granules to correct the terrace slope, followed by an acoustic mat to dampen sound for the rooms below, and thin gypsum-fiber boards (like Fermacell) to create a solid subfloor. The process is completed with the final floor finish, such as parquet, tile, or PVC. Because these "dry-build" systems don't require weeks of drying time like traditional wet cement, the final flooring can be laid almost immediately. To achieve a high-end look, the flooring is usually installed across the transition zone after the structure is settled, creating a perfectly seamless, "step-free" flow from your original home into the new rooftop space.
Step 7: Interior Finishing
Plasterboards, electrics, and plumbing (often for a new bathroom) are installed over several weeks.

Path B: The Prefabricated Method (Dakopbouw)
The "Plug and Play" second floor
Step 1: Factory Build
While you are still living in your house, the entire new floor is built in a factory—complete with windows, insulation, and sometimes even the first layer of plaster.
For a rooftop extension, the walls are constructed in the factory using a lightweight Timber Frame (Houtskeletbouw) system to avoid overloading your existing foundation. These walls arrive as a high-performance "sandwich," complete with integrated insulation, pre-installed electrical conduits, and a finished exterior—whether that’s modern wood cladding, zinc, or traditional brick slips. Because the walls are pre-assembled with millimeter precision, they can be craned into place and made weather-tight in a single morning, ensuring the interior of your home is protected from the elements immediately.
The Prefab flooring
In the prefab method, even when additional insulation is unnecessary, the factory builds a high-precision structural chassis designed to align perfectly with your existing home. The factory integrates the load-bearing frame, routes all electrical and plumbing conduits, and installs high-density acoustic layers to prevent noise from traveling to the rooms below. The subfloor is then fitted at a millimeter-accurate height so that once the unit is craned into place, it sits at the exact level needed for a flush transition. While the technical core is factory-made, the final flooring is typically laid on-site across the connection seam to hide the joint and ensure a flawless, "step-free" interior finish.
Step 2: Preparation Day
A small team prepares the "ring beam" on your existing roof to receive the new module.
Step 3: The Lift
A large crane lifts the entire floor (the "top box") in one piece. Within 4 to 6 hours, your house is capped and weather-tight.
Step 4: Connection
The remaining work is simply connecting the pre-installed pipes and wires to your home’s existing systems and finishing the staircase.

3. Construction of a Dormer
(Dakkapel)
For a Dormer (Dakkapel), the choice between on-site and prefab is the most common dilemma for Dutch homeowners. While the result looks similar, the construction "experience" is completely different.
Path A: The Traditional On-Site Method (Dakkapel)
Custom-built onto your existing roof structure.
This method is chosen when the house has a unique roof shape, uses non-standard materials (like natural slate), or when a crane cannot reach the property.
Step 1: Measuring & Strengthening
A carpenter measures the roof rafters. Often, the existing roof structure must be "doubled" or reinforced with extra beams to support the new window weight.
Step 2: The Cut-Out
The roof tiles are removed, and a hole is cut in the roof.
Step 3: Building the Frame
The sides (wangen) and the roof of the dormer are built piece-by-piece using timber.

Step 4: Insulation & Cladding
High-performance PIR insulation is added, and the exterior is finished with zinc, wood, or Keralit.
Step 5: Waterproofing
The flat roof of the dormer is sealed (usually with EPDM), and lead flashing (loodslabben) is installed at the base to ensure water flows perfectly back onto the tiles.

Path B: The Prefabricated Method (Dakkapel)
The 1-Day Transformation
This is the "standard" Dutch approach. The dormer is delivered as a finished product and "dropped" into place.
Step 1: Factory Production
The dormer is built in a controlled environment. This ensures the insulation is perfectly sealed and the window frames are airtight.
Step 2: The Opening
On the morning of delivery, a team arrives to cut the hole in your roof and remove the tiles.
Step 3: The Lift
A crane lifts the entire dormer (often weighing 800–1,200kg) onto the roof.
Step 4: Securing & Sealing
The dormer is bolted to the structural beams of your house. Because it is pre-made, the house is "open" for only a few hours. By lunchtime, the window is in, and the roof is water-tight.
Step 5: Interior Finishing (The Attic Transformation)
Whether you go traditional or prefab, the interior is usually delivered as a "shell." You will need to finish the inside to make it a room:
Insulation check: Ensuring the transition between the new dormer and your old roof is airtight.
Plasterboard & Stucco: Covering the timber frame with plasterboard and applying a smooth plaster finish.
Knee-walls (Knieschotten): Building storage cupboards under the slanted parts of the roof to maximize the new space.
Electricity: Extending your home’s wiring for new sockets and lighting.

Conclusion: Turning Your Vision into Reality
How Atelier NIRIS can help
Do you want to know if your house extension requires a building permit?
See also: